HandBrake
Jump to navigation
Jump to search
Converting DVDs
HandBrake is a free program which will let you rip your karaoke DVDs into individual songs which you can then add to your kJams library.
- if you've done all this before, on Mac, click "Presets" to make sure the drawer is showing (on the right), on Windows, it's always showing. Just click the "kJams" preset. If it's not there, read on to make a new one.
- First time only: Install the DVD CSS library.
- Download HandBrake, install it and run it
- Mac:
- you will automatically get the "Open" dialog, just select your DVD from the list on the left
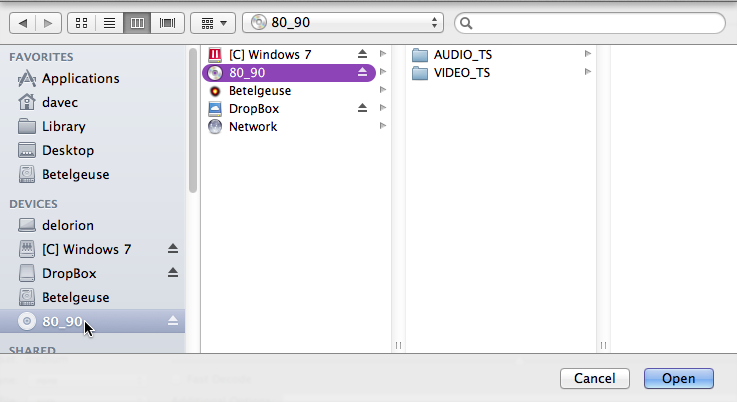
- you will automatically get the "Open" dialog, just select your DVD from the list on the left
- Windows:
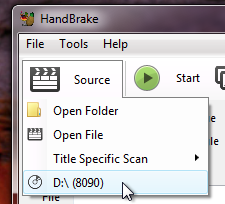
- click the "Source" button and pick your DVD drive:
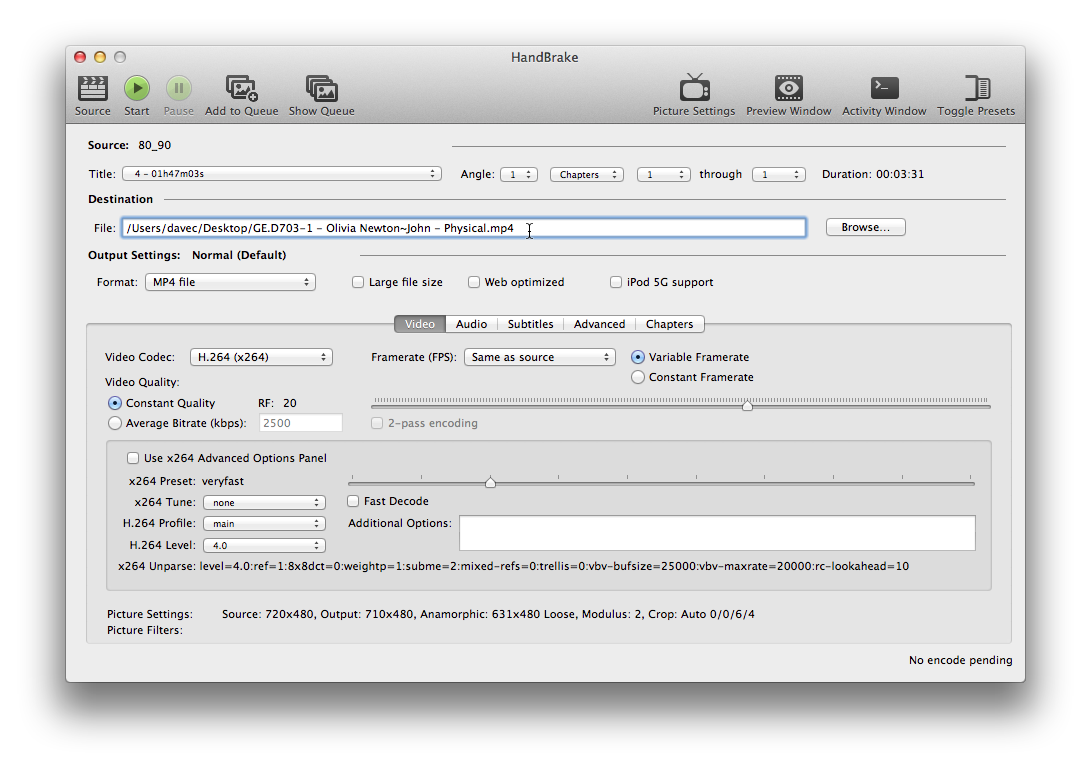
- click the "Browse" button, and navigate to the desktop. You can enter the name "foo" for now, which you will change later
- click the "Source" button and pick your DVD drive:
- in the "Destination" area, type in the title of the song using "L-T - R - S" format. (On Windows you're replacing the word "foo") For info on what that means, Click here. Notice i did NOT use a dash in the disc title, nor in the artist title. Instead i used a dot in the disc title, and a tilde in the artist title. That's because the metadata scanner template uses dashes to differentiate the meta components and you don't want to confuse it. You can fix this later inside kJams if you wish.
- Windows:
- you have back slashes, not forward slashes:

- you have back slashes, not forward slashes:
- in the "Source" area, under "Title": some discs have each song separated by title (titled songs), some have all songs under one title, separated by chapters (chapter songs).
- If you have Chapter Songs, there is only one choice for "Title", but then you must select one chapter at a time. For now, pick "Chapters 1 to 1" (to rip the first track)

- if you have "Title Songs", pick the first song under "Title", and select all the chapters (ie: starting chapter: 1, throught ending chapter: pick the biggest number)
- If you have Chapter Songs, there is only one choice for "Title", but then you must select one chapter at a time. For now, pick "Chapters 1 to 1" (to rip the first track)
- Your window should look something like this:
- Mac:
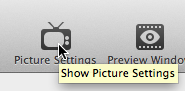
- click the "Picture Settings" button
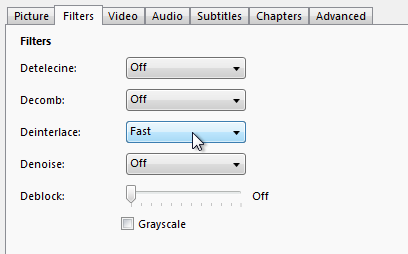
- click the "Filters" tab
- slide the knob from "Decomb" to "Deinterlace" (slide it to the right"
- click the "Picture Settings" button
- Windows:
- click the "Filters" tab
- from the "Deinterlace" menu, pick "Fast".
- The panel should now look like this:
- Mac:

- Windows:
- Mac:
- Mac: you can close the "Picture Settings" panel.
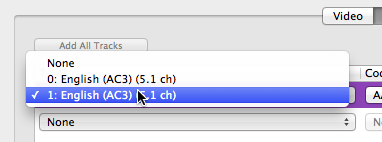
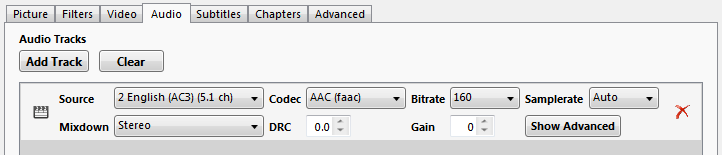
- Back in the main window, click the "Audio" tab
- In the "Track" list, set the first track's popup menu to whatever audio channel has "instrumental" only (it should be marked which channel is instrumental on the DVD cover sleeve, on my disc it said channel 2, so i pick the 2nd entry in the menu)
- Mac
- Windows
- note that "WorldStar" DVDs apparently mix the vocal into the center, there is no audio channel that has no vocals. In that case you must use kJams "Suppress Center Channel" from the Controls menu
- Mac
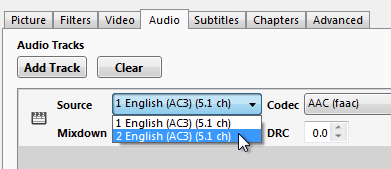
- in the "Mixdown" list set it to "Stereo"
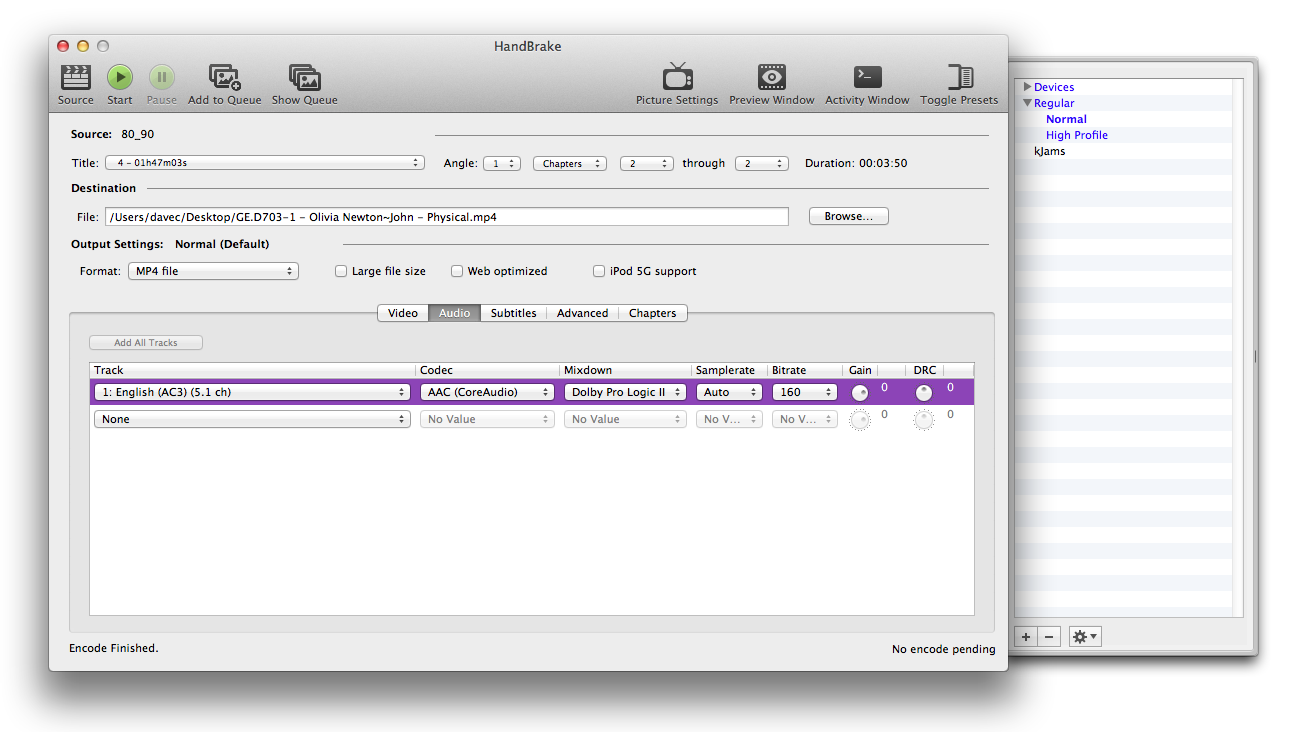
- The window should look something like this:
- Mac:
- Windows:
- Mac:
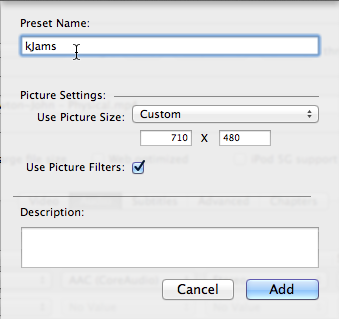
- Now save the preset by clicking the little plus button at the bottom of the presets drawer
- name the preset "kJams" so you'll remember it, and use it next time, also set "Picture Settings" to "Currnet"
- click the "Add to Queue" button
- back in the "Source" area:
- for "Title Songs", pick the next entry next to "Title", and then adjust the "through" chapter to be the highest number
- for "Chapter Songs", pick "Chapters 2 to 2" (to rip the second track)
- type the song title like you did before, same format

- repeat the above 3 steps for all the tracks you want
- click the "Start" button
- have coffee or lunch or whatever
- in the "Destination" area (see step 6), you can see the path to where the resulting movie was stored. You can now move that file to it's permanent location, where you will never move them again (ie: not on your desktop). Go to your file system browser (Mac: Finder, Windows: Windows Explorer), and drag and drop your file to where you want it stored.
- go to kJams and add them to your library
- If the interpret dialog comes up, pick "L-T - R - S" and you're done
- otherwise, select your new imports (all of them) and right click (control click) and pick "reinterpret names", then do the above and hit okay
- Rejoice!
Converting Files
- do steps 1, 2, 3, from above
- click the "Source" button
- if you're converting a single file:
- select the file, click OK
- do steps 6, 7
- if you're converting multiple files:
- pick / select the folder, click OK
- in the File Menu, pick "Add all titles to Queue", confirm you want to do this, click OK
- click the "Show Queue" button
- for each item in the Queue:
- right click it and pick "Edit" (this moves it out of the Queue and into the HandBrake window)
- do step 6, 7 above
- click "Add to Queue" (to move it back from the HandBrake window to the Queue window)
- in the Queue window hit the Start button
- continue from step 26 above