Full Disk Access: Difference between revisions
Jump to navigation
Jump to search
No edit summary |
No edit summary |
||
| Line 9: | Line 9: | ||
# in the list on the right, if you don't see "kJams" listed, click the "+" button below that list, then find and select the kJams application icon (or you can just drag and drop kJams into that list). | # in the list on the right, if you don't see "kJams" listed, click the "+" button below that list, then find and select the kJams application icon (or you can just drag and drop kJams into that list). | ||
# Ensure the checkbox to the left of the kJams icon is checked | # Ensure the checkbox to the left of the kJams icon is checked | ||
# Quit kJams and run it again, you will see the message again, check the "don't warn me again" checkbox, and you're done! | |||
Revision as of 19:31, 27 September 2022
kJams requires "Full Disk Access" to function properly. Before you run kJams for the first time, please refer to this screen shot, and follow the below steps:
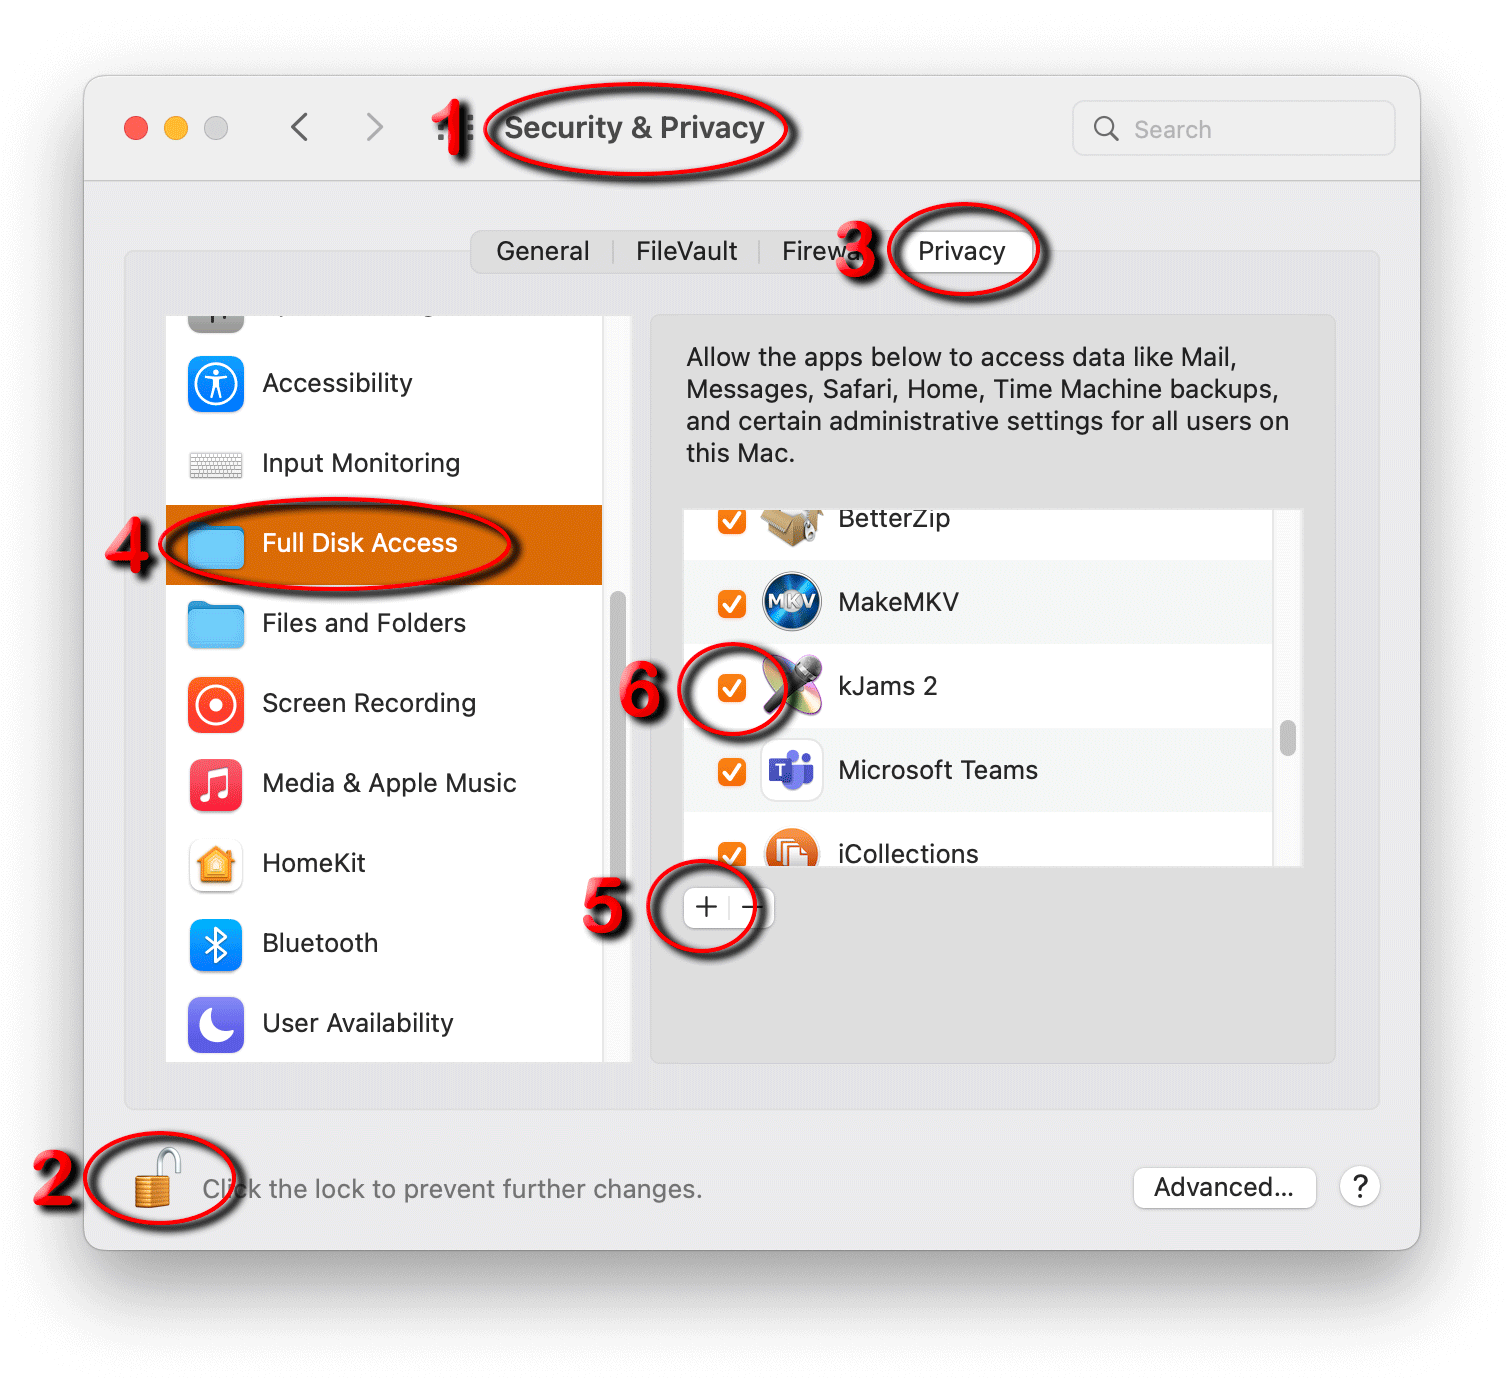
- Go to the Apple Menu and pick "System Preferences", and then select "Security and Privacy"
- Click the little Lock icon in the lower left, then enter your password
- Click the tab (across the top of the window pane) with the title "Privacy"
- In the list on the left, scroll down until you see "Full Disk Access", and select it
- in the list on the right, if you don't see "kJams" listed, click the "+" button below that list, then find and select the kJams application icon (or you can just drag and drop kJams into that list).
- Ensure the checkbox to the left of the kJams icon is checked
- Quit kJams and run it again, you will see the message again, check the "don't warn me again" checkbox, and you're done!